If you love the look of luxury textured walls but want something more artistic and customised, stencil wall finishes are a perfect choice. With MacoAvell Velplas as the base, Vellcco for the stencil pattern, and a two-tone metallic wax finish, you can create a statement wall that feels handcrafted, elegant, and one-of-a-kind—ideal for feature walls in living rooms, bedrooms, reception counters, cafés, boutiques, and show units.
In this guide, we’ll walk you through the step-by-step stencil application process for a clean pattern, strong definition, and a metallic finish that catches light beautifully from different angles.
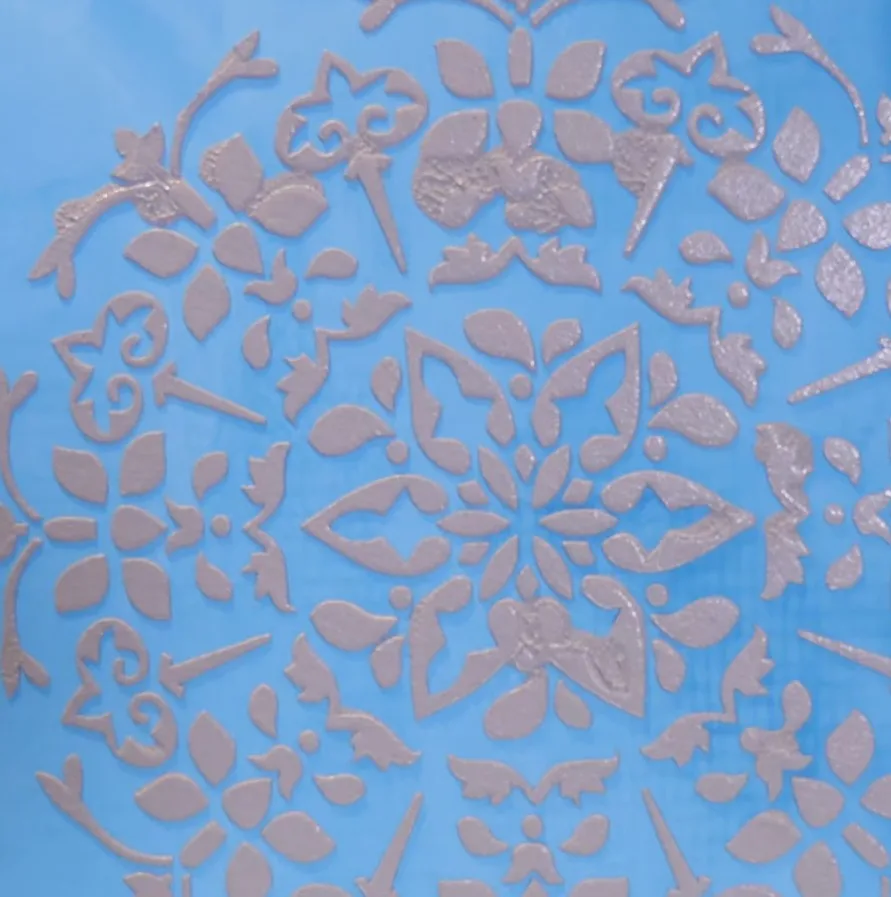
Why This MacoAvell Stencil System Works
This stencil combination is popular because each layer plays a clear role:
- Velplas (Base Layer): Creates a smooth, consistent foundation so the stencil pattern appears sharp and even.
- Vellcco (Stencil Pattern Layer): Builds the raised or defined stencil texture and forms the design detail.
- Two-Tone Metallic Wax (Finishing Layer): Adds depth, shine, and dimension—highlighting the stencil edges and creating a premium “designer wall” look.
Materials & Tools You’ll Need
Materials
- MacoAvell Velplas (base)
- MacoAvell Vellcco (stencil texture)
- MacoAvell Metallic Wax (choose 2 colours for a two-tone effect)
- Clean water (for tools)
Tools
- Stainless steel trowel/spatula
- Stencil sheet (repeat pattern design)
- Masking tape (to secure stencil)
- Sponge / small trowel/palette knife (for stencil application)
- Soft cloth or sponge for wax
- Polisher + foam pad (optional for stronger sheen)
- Sandpaper / abrolon (optional for refinement, depending on effect)
Step-by-Step: How to Apply Stencil Texture with Two-Tone Metallic Wax
Step 1: Prepare the Wall Surface
A perfect stencil finish starts with proper preparation.
- Ensure the wall is dry, clean, and free of dust, oil, or loose paint.
- Repair imperfections and smooth out uneven areas.
- Apply a suitable sealer/primer based on your wall condition (especially for new plaster or powdery surfaces).
Pro tip: A stable, sealed surface helps the stencil edges stay crisp.
Step 2: Apply the Velplas Base Layer
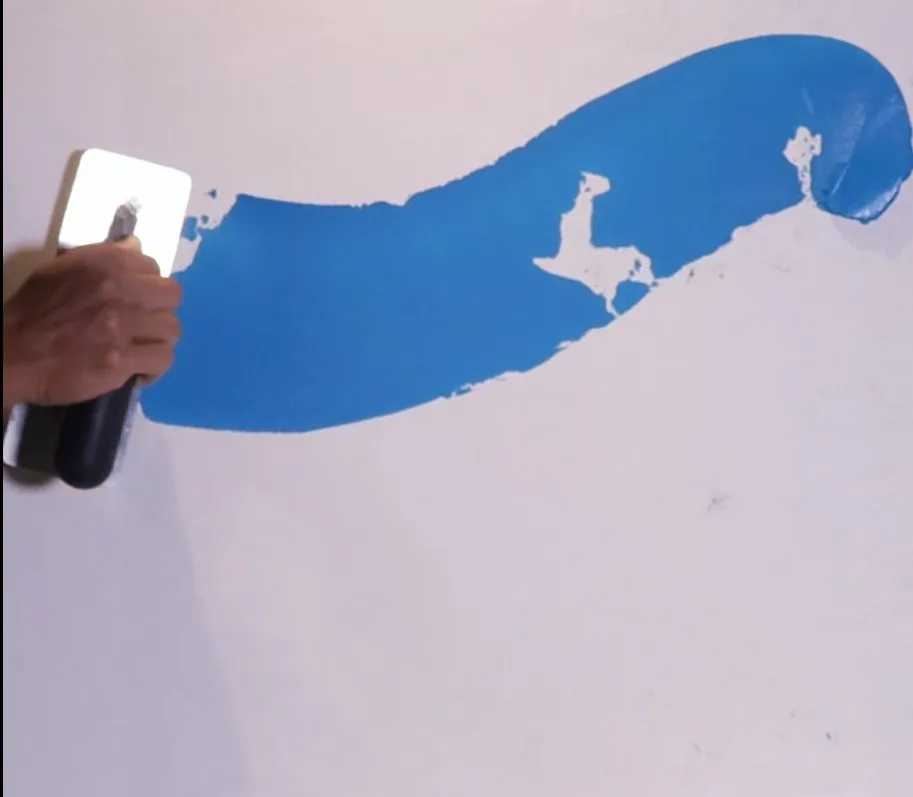
Velplas creates a uniform canvas for your stencil pattern.
- Load a small amount of Velplas onto the trowel.
- Apply an even layer across the wall (work in manageable sections).
- Maintain consistent pressure to keep the base texture balanced.
- Allow it to fully dry.
If a second base coat is needed (for smoother coverage or stronger body), apply another thin layer and let it dry completely.
Step 3: Position & Secure the Stencil
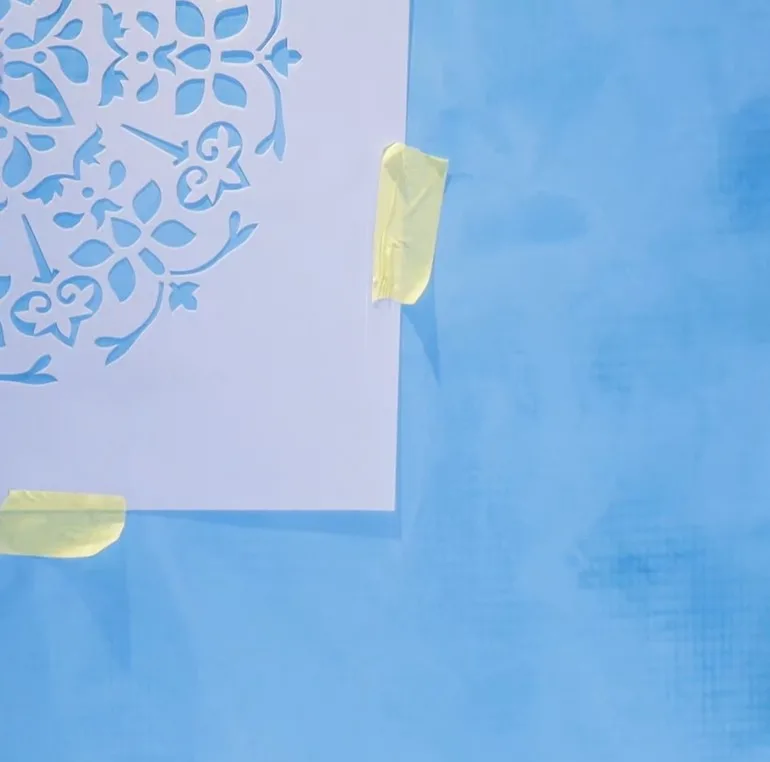
- Align your stencil on the wall (start from a straight reference line).
- Use masking tape to secure all edges so it doesn’t shift.
- Check spacing and pattern repetition before applying Vellcco.
Pro tip: Mark light guideline points to keep the stencil pattern straight across large walls.
Step 4: Apply Vellcco Over the Stencil (Create the Pattern)
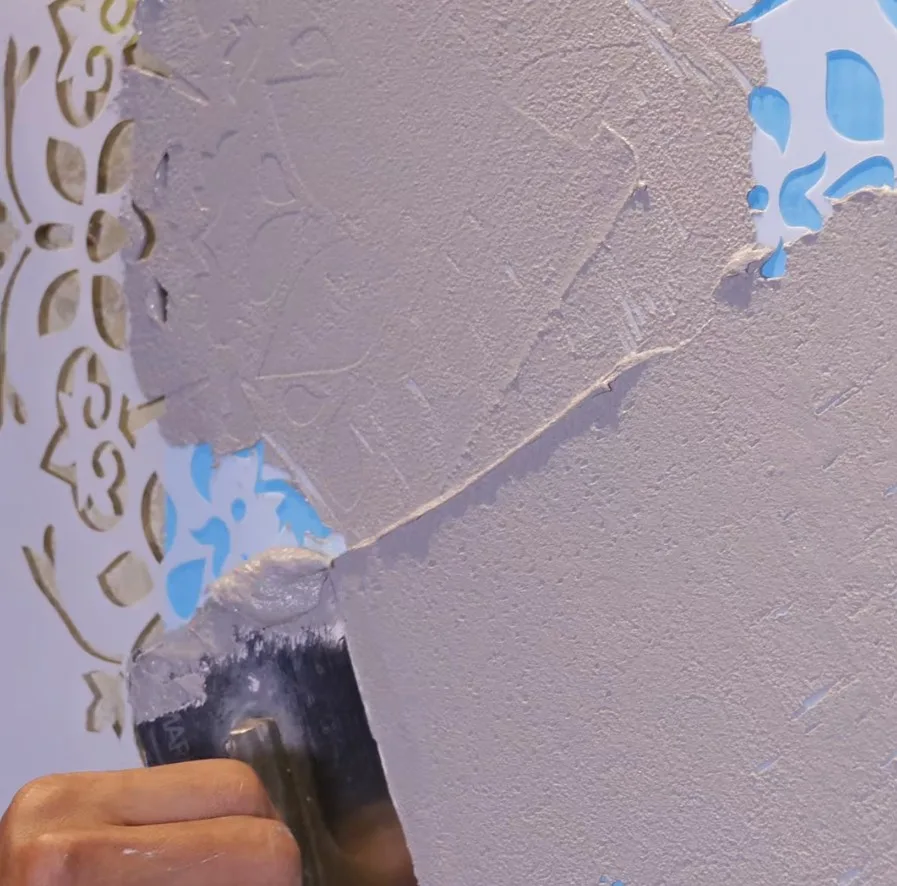
This is where your design forms.
- Place a small amount of Vellcco on a palette knife or small trowel.
- Apply Vellcco over the stencil openings using gentle, controlled strokes.
- Avoid overloading—too much material can seep under the stencil and blur the pattern.
- Smooth lightly so the thickness remains consistent across the design.
Step 5: Carefully Remove the Stencil
- Remove the stencil slowly while the Vellcco is still workable (not fully hardened).
- Peel back at an angle to avoid lifting the texture.
- Let the stencil pattern dry completely.
Pro tip: If you’re repeating patterns, clean excess material from the stencil regularly for sharper edges.
Step 6: Repeat the Pattern Across the Wall
Move to the next section:
- Align the stencil with the previous pattern using the stencil’s registration points (if available).
- Secure it again and repeat Steps 4–5 until the full wall is complete.
- Place some vellcco on the trowel and tap it on the stencil application
Allow the entire wall to fully dry before waxing.
Two-Tone Metallic Wax Finish (Luxury Highlight Effect)
Step 7: Prepare Two Metallic Wax Colours
Choose two complementary metallic wax colours (examples):
- Gold + Champagne
- Silver + Pearl White
- Bronze + Copper
- Emerald + Graphite (for a modern bold look)
You can keep the two tones distinct or slightly blend them depending on the final style you want.
Step 8: Apply the First Metallic Wax Tone (Base Sheen)
- Use a soft cloth or sponge.
- Apply a thin layer of the first wax colour across the surface.
- Focus on filling the low areas gently while maintaining a smooth application.
Let it set slightly (follow product working time based on site conditions).
Step 9: Apply the Second Metallic Wax Tone (Highlight the Stencil)
- Use a clean cloth or sponge (or a small trowel for stronger highlights).
- Apply the second wax colour lightly, mainly over the raised stencil pattern.
- Use minimal pressure so the highlights stay on the stencil design and don’t overpower the base.
Pro tip: The best two-tone effect comes from “less is more”—thin layers build depth naturally.
Step 10: Blend & Refine the Finish
To achieve that premium layered look:
- Blend gently where the tones meet to create a soft transition, or
- Keep edges sharper for a more graphic stencil effect.
Optional:
- Light polishing with a foam pad can enhance the metallic shine and give a smoother, luxe finish.
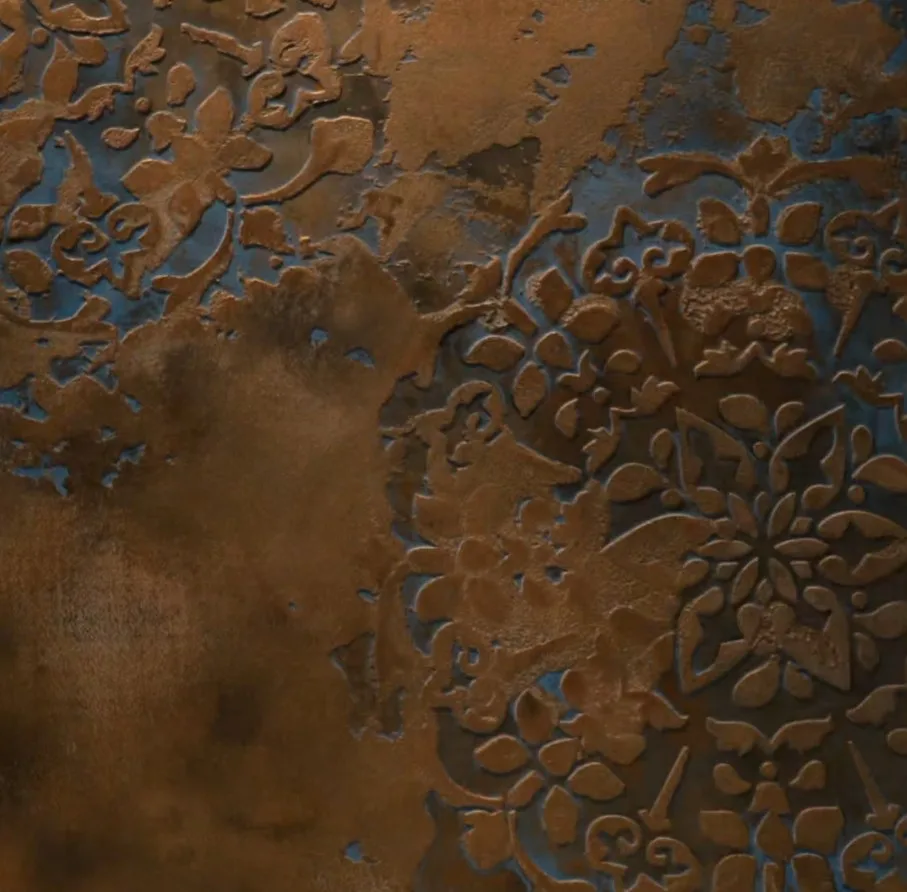
Final Result: A Custom Designer Feature Wall
Once complete, your stencil wall will show:
- A clean, repeated pattern with depth (from Vellcco)
- A refined base texture (from Velplas)
- A high-end metallic glow and layered dimension (from two-tone metallic wax)
This finish works beautifully under spotlighting, warm lighting, and natural daylight—changing character as the angle of light shifts.
Where This Finish Looks Best
- TV feature wall/living hall statement wall
- Hotel-inspired master bedroom backdrop
- Reception counter wall/lobby feature
- Café, showroom, boutique, gallery walls
- Accent niches, columns, and corridor highlights